I'm back, with another update on my Battle of Five Armies project!
What with the improving weather, much of my spare time lately has been spent tramping the hills and dales around my house- but I've still managed to paint up some new stuff none-the-less...
First off was my Great Eagle- this thing is huge, but since it's a plastic kit it was nice and easy to build. You can actually make two Eagles from the GW boxed set, but for now the other remains on the shelf unpainted. I'm looking forward to seeing it swoop through the ranks of Gundabad very soon!
*The Great Eagle crashes into a mob of Gundabad Orcs, while the Grey Pilgrim himself looks on.
Speaking of which, I've finally churned through the rest of my Goblins in the form of two Units of Warriors with various hand weapons- once again, these are the Oathmark plastics from Northstar!
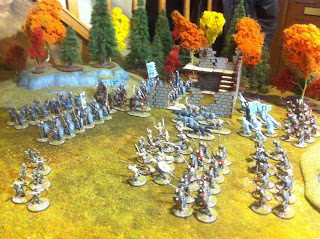
*The forces of the Shadow as they stand so far- this little lot should cover all my Goblin requirements for future Middle Earth projects...
Last of all was Gandalf himself- this is a re-paint/re-basing of an old GW model I had lying around, and I'm pretty pleased with how he turned out.
*A closer look at my Great Eagle and good old Gandalf the Grey- probably my favourite Tolkien character!
This week the new plastic Elves for Oathmark went up for order, so I immediately bought a couple of boxes plus the metal character models for my Mirkwood contingent. The only thing I'm not so keen on in the kit are the shields, which look a little too 'Warhammer' for me- so I've ordered some kite shields from Gripping Beast to replace them. These have the benefit of giving that 'Dark Age' feel I'm after; plus they look a little bit like leaves, in keeping with the Elven aesthetic!
In the meantime I have Bolg and his guard plus Thorin's Company (and Bilbo!) assembled and ready for undercoating- after all that is completed I think it will finally be time for some games of Dragon Rampant!
After that? Maybe a quick trip to Sub-Roman Britain via Dux Bellorum before it's back to Middle Earth for the Angmar/Arnor wars...
Wednesday, 18 April 2018
Wednesday, 28 March 2018
The Gathering of the Clouds, Part 2.
The Middle Earth project is going well so far- I've just finished the basing on my Iron Hills Dwarves and Wargs!
After much searching, I came across an excellent range of 'Dark Age Dwarves' by Conqueror Miniatures- I ordered a pack of their Dwarves with two-handed hammers, and these have just arrived today (along with the models I will be using for Dain and his hangers-on), and they look like a great match scale-wise for the Oathmark plastics!
*Dwarf warriors form-up around their Captain (Oathmark miniatures by Northstar) as Wargs (Otherworld Miniatures Wolves) burst from the trees!
*Being quite a militaristic culture, I went for a fairly 'uniform' look to my Iron Hills Dwarves using a palette of red, black and off-white!
I know Tolkien mentions the Dwarves being armed mainly with two-handed mattocks in the battle- however the Oathmark Dwarves don't come with this option so for now I've gone for the good old fashioned spear and shield for one unit and sword/axe/hammer and shield for the other!After much searching, I came across an excellent range of 'Dark Age Dwarves' by Conqueror Miniatures- I ordered a pack of their Dwarves with two-handed hammers, and these have just arrived today (along with the models I will be using for Dain and his hangers-on), and they look like a great match scale-wise for the Oathmark plastics!
*The Hound of Sauron surveys the battle (Otherworld Dire Wolf).
Right now I have a Great Eagle (the GW plastic kit) to finish off and then it's on to yet more Oathmark Goblins!..
*The forces of the Free Folk so far (Hopefully not long now until the Oathmark Elves are out!)...
*...And the army of the Shadow as it stands- soon to grow in numbers!
As always, cheers for reading! I'll be back with a finished Eagle in the near future, along with some musings on what figure ranges I'll be looking at for future Middle Earth painting!
Sunday, 25 March 2018
The Gathering of the Clouds, Part 1.
I mentioned a big new painting project in my last Post- this will be a Middle Earth collection, based on Tolkien's stories and the imagery in Cubicle 7's outstanding The One Ring RPG sourcebooks rather than the movies. This is something I've always wanted to do, and it seems like the time is now right!
So, throughout this Post you will see my collection so far- Men of Esgaroth plus Beorn, versus Goblins from Gundabad and a Troll. Following closely behind these in a later Post you will see my Iron Hills Dwarves and Wargs.
Apart from the Old West, the Dark Ages is my favourite historical period to game in- so for figures I will be mainly looking at ranges from this era (plus a few Ancients where applicable!).
Apart from this, I'll also be using Northstar's Oathmark plastic fantasy figures for much of the 'non-human' stuff, amongst others- in short, this will be an opportunity to pick and choose all kinds of interesting minis to suit the needs of the project!
I had a good think about scale and also which rules I would use- after much deliberation, I settled on 28mm (though 10 and 15mm were in the running) as the extra detail and character were a no-brainer! Rules-wise I will be using Dragon Rampant (with a couple of 'tweaks' for extra flavour) as it's fun and quick to play, while being sufficiently open-ended when it comes to designing units. As the figures are mainly individually based, I could also branch out into Saga, Open Combat, Song of Blades and Heroes or even GW's Strategy Battle Game!
The downside of choosing DR is that it's not really intended to represent 'mass battles'- I reasoned that I could look at a given battle as described by Tolkien and break it down into several separate scenarios, with each being just one 'snapshot' of the larger battle- of course, a little gamer's licence could also come to the fore as required... For example each individual figure could actually represent several warriors. Broad brush-strokes will be the order of the day!
To kick off the collection, I decided to focus on the Battle of Five Armies from The Hobbit- this would give me a nice spread of interesting troop types and characters as a foundation for later. I will also be looking at the wars between Arnor and Angmar, the Battles of the Fords of Isen and eventually work my way up to the 'big daddy'- Pelennor Fields!
So, throughout this Post you will see my collection so far- Men of Esgaroth plus Beorn, versus Goblins from Gundabad and a Troll. Following closely behind these in a later Post you will see my Iron Hills Dwarves and Wargs.
*The forces clash over an outpost on the shores of the Long Lake!
Apart from the Old West, the Dark Ages is my favourite historical period to game in- so for figures I will be mainly looking at ranges from this era (plus a few Ancients where applicable!).
Apart from this, I'll also be using Northstar's Oathmark plastic fantasy figures for much of the 'non-human' stuff, amongst others- in short, this will be an opportunity to pick and choose all kinds of interesting minis to suit the needs of the project!
*Bard and his Bowmen hold the hill (Gripping Beast plastic Late Romans)...
I had a good think about scale and also which rules I would use- after much deliberation, I settled on 28mm (though 10 and 15mm were in the running) as the extra detail and character were a no-brainer! Rules-wise I will be using Dragon Rampant (with a couple of 'tweaks' for extra flavour) as it's fun and quick to play, while being sufficiently open-ended when it comes to designing units. As the figures are mainly individually based, I could also branch out into Saga, Open Combat, Song of Blades and Heroes or even GW's Strategy Battle Game!
*...While a Goblin Shaman and his minions storm the lower slopes (Oathmark plastic Goblin Infantry)!
The downside of choosing DR is that it's not really intended to represent 'mass battles'- I reasoned that I could look at a given battle as described by Tolkien and break it down into several separate scenarios, with each being just one 'snapshot' of the larger battle- of course, a little gamer's licence could also come to the fore as required... For example each individual figure could actually represent several warriors. Broad brush-strokes will be the order of the day!
*A clash of the titans (Reaper Bones Ogre, and a DeeZee- I think- cave bear).
To kick off the collection, I decided to focus on the Battle of Five Armies from The Hobbit- this would give me a nice spread of interesting troop types and characters as a foundation for later. I will also be looking at the wars between Arnor and Angmar, the Battles of the Fords of Isen and eventually work my way up to the 'big daddy'- Pelennor Fields!
*Another shot of the forces of the Shadow...
*...And another of the brave Men of Esgaroth (plus friend!).
Finally, I'll leave you with a quick question about Beorn- I like the model I'm using right now, but I wonder if he could be bigger still? Most of the artwork I've seen seems to shows Beorn towering over the other fighters- to this end, I picked up a pre-painted variant from Ebay. What do you think- is this fellow too big, or more appropriate?
Cheers!
Thursday, 22 March 2018
Dracula's Painting Part 2- The Revenge!
During my recent extended period of Internet 'downtime', I managed to get some more figures painted for my steadily-growing Dracula's America collection...
I may be bringing some of these along with me to the demo game at Partizan in May- I always feel nervous handling the fantastically painted 'official' miniatures!
First off, we have my Shadow Dragon Tong Posse:
*I tried to give my two Guilao (the spearman on the left and the central swordsman) a 'ghostly' paint-effect on their arms to give the feel of them being partially ethereal- not sure how well it worked out, but it was an interesting experiment!
Followed by the second of the new Factions from Hunting Grounds- The Forsaken:
*Not sure if the photo shows it very well, but I'm very pleased with the painted-on weathering- if you look closely you might see a few elbows and knees (even a few toes!) sticking out of the clothing- the fellow bottom left also has some tears in his sleeve... The Trooper on the far right has both a mounted and dismounted version.
Next, we have a rag-tag band of Hired Guns, including the Wargames Illustrated Django and his portable gatling gun (kept in the coffin when not in use, of course!). Getting to write rules for using him in DA was a real treat!
*I'm particularly pleased with how the Stitch Doctor turned out- a deceptively simple miniature that was a joy to paint- I used several different skin tones on various parts of him to try and give him a 'patchwork' look, but again I suspect my camera-phone doesn't really show this very well!
And finally, my Unwelcome Guests. These were great fun to paint- especially the Jackalope, which I've been wanting to paint up for ages now! Thanks also to Ash at Guerrilla Miniature Games for the inspiration to paint the Hellhound up as a skinless monstrosity.
*The only one of these critters that is not an 'official' DA figure is the Vampire Ancient on the right- this is a 'Vampire in Manbat form' by the excellent Heresy Miniatures!
So, that's everything new for now- I have some more Apaches close to finishing (to replace my tiny wee Foundry ones who are looking a little bit small compared to everybody else!), and then I'd like to turn my hand to the new Northstar Plains Skinwalker Posse...
I'll be back soon with the first offerings for what I hope will be my big painting project for this year- something I've been wanting to do for many years...
I may be bringing some of these along with me to the demo game at Partizan in May- I always feel nervous handling the fantastically painted 'official' miniatures!
First off, we have my Shadow Dragon Tong Posse:
*I tried to give my two Guilao (the spearman on the left and the central swordsman) a 'ghostly' paint-effect on their arms to give the feel of them being partially ethereal- not sure how well it worked out, but it was an interesting experiment!
Followed by the second of the new Factions from Hunting Grounds- The Forsaken:
*Not sure if the photo shows it very well, but I'm very pleased with the painted-on weathering- if you look closely you might see a few elbows and knees (even a few toes!) sticking out of the clothing- the fellow bottom left also has some tears in his sleeve... The Trooper on the far right has both a mounted and dismounted version.
Next, we have a rag-tag band of Hired Guns, including the Wargames Illustrated Django and his portable gatling gun (kept in the coffin when not in use, of course!). Getting to write rules for using him in DA was a real treat!
*I'm particularly pleased with how the Stitch Doctor turned out- a deceptively simple miniature that was a joy to paint- I used several different skin tones on various parts of him to try and give him a 'patchwork' look, but again I suspect my camera-phone doesn't really show this very well!
And finally, my Unwelcome Guests. These were great fun to paint- especially the Jackalope, which I've been wanting to paint up for ages now! Thanks also to Ash at Guerrilla Miniature Games for the inspiration to paint the Hellhound up as a skinless monstrosity.
*The only one of these critters that is not an 'official' DA figure is the Vampire Ancient on the right- this is a 'Vampire in Manbat form' by the excellent Heresy Miniatures!
So, that's everything new for now- I have some more Apaches close to finishing (to replace my tiny wee Foundry ones who are looking a little bit small compared to everybody else!), and then I'd like to turn my hand to the new Northstar Plains Skinwalker Posse...
I'll be back soon with the first offerings for what I hope will be my big painting project for this year- something I've been wanting to do for many years...
Welcome To The Jungle
The old ones are always the best, right?
Cliched Post-headings aside, what follows is a quick report of my first game of Ghost Archipelago.
I would be using my 'Sinbad-esque' Northstar Crew, versus Andy in command of my own Sohei warrior-monks (originally for Warlord Games' excellent Test of Honour!).
As this was a demo game, we played the basic scenario- a brief explanation of the differences between GA and Frostgrave, and we were off!
It began with both Crews predictably advancing towards the central treasure at the sacrificial pit- Andy's peasants having a little trouble crossing the water separating them from the 'mainland', and drawing the attentions of a shark!
I split my Crew into two 'teams'- my Heritor Suladin leading one and his brother Omar (my Warden) leading the other. Omar's group split off and circled around the pyramid towards the treasures lying on some small islands, while Suladin forged on through the jungle towards the sacrificial pit.
Andy's Crew meanwhile advanced in force, with a 'firebase' of musket-men (counting as Crossbowmen) left behind to garrison some ruins that overlooked the treasure islands on his right flank.
One of my two Archers had a clear shot at the rival Crew as they made land-fall, but the enemy Heritor snatched the arrow out of the air!
Meanwhile, one of Andy's Infantrymen- afraid to cross the water surrounding his starting position- was ambushed by a venomous Snakeman! Perhaps embarrassed by his earlier hydrophobia, he took out his frustrations on the scaly creature and battered it to the ground over a couple of rounds of combat...
My other Archer (from Omar's team) had climbed the pyramid, and so now had commanding views over the whole battlefield. Unfortunately for me he did little but harass the enemy for the rest of the battle- until a pinpoint musket shot finally tumbled him from his precarious perch!
With my missile support proving ineffective, Suladin ordered his men to fall back to the pyramid with their treasure while he attempted to hold back the encroaching foe- in his first close combat of the game he Sprinted into melee with Andy's other Infantryman and promptly Critted the poor soul! He would go on to take out the enemy Warden and another peasant... Heritors are great!
While my Heritor got his hands dirty, I was playing it cagey on my left flank- the treasure was right there across the water, but Andy's formidable firebase of teppo-armed peasants was giving Omar and his lads pause... I buffed my Pearl Diver Tok with Omar's spells and then sent him on a daring amphibious assault mission- the water protecting him from the worst of the enemy fire and buying time for Omar and the others to make a mad dash across the water to the island!
Tok even managed to reach land, outflank the peasants and shiv one with his obsidian blade before an Infantryman (with a natty new pair of snakeskin boots!) got involved and clubbed him to the ground unceremoniously!
Continuing the aquatic misadventures, one of Andy's Crewmen attempted to escape from the mainland with the golden idol he was carrying- he got halfway across the water and promptly failed his next swimming test! The hungry shark from before obviously had a taste for peasant as it took a chunk out of him in the Creature Phase- the fresh blood in the water attracting yet another shark! In his next turn, the unfortunate swimmer failed his test again and the two ravenous fish closed in and chewed him up in short order, the idol sinking down through the red waters...
To cheer Andy up, his musket-men had recovered from Tok's surprise attack and opened up on Omar as he tried to reach the treasure on the small island- they had already downed his remaining Crewmate! Omar survived their fusillade (barely), and limped towards the water with treasure tucked under his arm. Slowed by his injuries and the weight of all that gold, he was caught by Andy's Heritor and (despite actually winning the first round!) cut down for his troubles, while his brother Suladin could only watch from the jungle, powerless to help!
And so the dust settled- both Crews had been mauled severely, but both had come away with a fair amount of loot! Even though this wasn't a Campaign game, we went through the after-game process just for fun. Everybody survived, and various magic weapons and herbs were discovered- I even managed to find a coveted map-stone with a roll of 20; you just know that I'll never manage that again when we play a proper Campaign!
Overall, GA is great fun- a nice change of environment from the dark ruins of Frostgrave and a chance to paint up some exotic characters and creatures! While Frostgrave is brilliant, GA really feels a little slicker! After playing, we had a long and enthusiastic discussion about ideas for Crews, and Andy went away with plans for a Spartan-inspired force. My next Crew is sat in the painting queue as I write this, and will be a band of greedy (and extremely sun-burnt) Vikings!
Cliched Post-headings aside, what follows is a quick report of my first game of Ghost Archipelago.
I would be using my 'Sinbad-esque' Northstar Crew, versus Andy in command of my own Sohei warrior-monks (originally for Warlord Games' excellent Test of Honour!).
As this was a demo game, we played the basic scenario- a brief explanation of the differences between GA and Frostgrave, and we were off!
It began with both Crews predictably advancing towards the central treasure at the sacrificial pit- Andy's peasants having a little trouble crossing the water separating them from the 'mainland', and drawing the attentions of a shark!
I split my Crew into two 'teams'- my Heritor Suladin leading one and his brother Omar (my Warden) leading the other. Omar's group split off and circled around the pyramid towards the treasures lying on some small islands, while Suladin forged on through the jungle towards the sacrificial pit.
Andy's Crew meanwhile advanced in force, with a 'firebase' of musket-men (counting as Crossbowmen) left behind to garrison some ruins that overlooked the treasure islands on his right flank.
One of my two Archers had a clear shot at the rival Crew as they made land-fall, but the enemy Heritor snatched the arrow out of the air!
Meanwhile, one of Andy's Infantrymen- afraid to cross the water surrounding his starting position- was ambushed by a venomous Snakeman! Perhaps embarrassed by his earlier hydrophobia, he took out his frustrations on the scaly creature and battered it to the ground over a couple of rounds of combat...
|*Green D6 used to track the Snakeman's remaining health.
My other Archer (from Omar's team) had climbed the pyramid, and so now had commanding views over the whole battlefield. Unfortunately for me he did little but harass the enemy for the rest of the battle- until a pinpoint musket shot finally tumbled him from his precarious perch!
With my missile support proving ineffective, Suladin ordered his men to fall back to the pyramid with their treasure while he attempted to hold back the encroaching foe- in his first close combat of the game he Sprinted into melee with Andy's other Infantryman and promptly Critted the poor soul! He would go on to take out the enemy Warden and another peasant... Heritors are great!
*Natural 20 recorded here for posterity- it will never happen to me again...
While my Heritor got his hands dirty, I was playing it cagey on my left flank- the treasure was right there across the water, but Andy's formidable firebase of teppo-armed peasants was giving Omar and his lads pause... I buffed my Pearl Diver Tok with Omar's spells and then sent him on a daring amphibious assault mission- the water protecting him from the worst of the enemy fire and buying time for Omar and the others to make a mad dash across the water to the island!
Tok even managed to reach land, outflank the peasants and shiv one with his obsidian blade before an Infantryman (with a natty new pair of snakeskin boots!) got involved and clubbed him to the ground unceremoniously!
Continuing the aquatic misadventures, one of Andy's Crewmen attempted to escape from the mainland with the golden idol he was carrying- he got halfway across the water and promptly failed his next swimming test! The hungry shark from before obviously had a taste for peasant as it took a chunk out of him in the Creature Phase- the fresh blood in the water attracting yet another shark! In his next turn, the unfortunate swimmer failed his test again and the two ravenous fish closed in and chewed him up in short order, the idol sinking down through the red waters...
*Smile, you sonofa...Aarghh!
To cheer Andy up, his musket-men had recovered from Tok's surprise attack and opened up on Omar as he tried to reach the treasure on the small island- they had already downed his remaining Crewmate! Omar survived their fusillade (barely), and limped towards the water with treasure tucked under his arm. Slowed by his injuries and the weight of all that gold, he was caught by Andy's Heritor and (despite actually winning the first round!) cut down for his troubles, while his brother Suladin could only watch from the jungle, powerless to help!
And so the dust settled- both Crews had been mauled severely, but both had come away with a fair amount of loot! Even though this wasn't a Campaign game, we went through the after-game process just for fun. Everybody survived, and various magic weapons and herbs were discovered- I even managed to find a coveted map-stone with a roll of 20; you just know that I'll never manage that again when we play a proper Campaign!
Overall, GA is great fun- a nice change of environment from the dark ruins of Frostgrave and a chance to paint up some exotic characters and creatures! While Frostgrave is brilliant, GA really feels a little slicker! After playing, we had a long and enthusiastic discussion about ideas for Crews, and Andy went away with plans for a Spartan-inspired force. My next Crew is sat in the painting queue as I write this, and will be a band of greedy (and extremely sun-burnt) Vikings!
Monday, 12 March 2018
I'm Still Alive!
Howdo folks- just a quick Post to confirm that I'm still here! I've been having internet issues the last month or so which are now (hopefully) sorted- so all being well you can expect regular Posts here and on the good old LAF again!
Rest assured that I have been keeping busy on the gaming front during this period of radio silence...
Cheers!
Jonathan
Rest assured that I have been keeping busy on the gaming front during this period of radio silence...
Cheers!
Jonathan
Thursday, 25 January 2018
This Town...
With Hunting Grounds being released into the wild this week, myself, Tony and Tom decided to revisit the first Scenario from the book- the Ghost Town.
I would be playing my Apache Posse- the Firemakers (using the Theme rules from HG); Tony would command the Dark Confederacy, and Tom would assume the mantle of the Twilight Order.
We would be playing on less urban terrain, so I set up a badlands ranch as the 'Ghost Town' surrounded by rock formations and cacti- as per the Scenario, the buildings would begin the game in the spirit realm; and so we used green glass counters to show this.
The game began with the Posses converging on the spectral buildings- the Twilight Order hanging back slightly to assume good firing positions (one rifleman by the name of Hank even clambering to the top of a precarious rock-spire), while the Confederates advanced behind their usual wall of expendable Revenants! The Firemakers, meanwhile, divided their forces- one half led by their Chief, Bodaway; the other led by the Shaman Taklishim.
Bodaway's group would shift into the Hunting Grounds and attack from there, while Taklishim's braves would mount an assault in the physical realm. The cards were kind to me, and I got the necessary red suits to pull this two-pronged assault off!
Careful fire-discipline in the early stages of the game saw the Order give the Confederates something to think about- first mowing down the Revenants and then opening up on the living behind, they managed to Shake the Necromancer- Tom knew that if he could drop the evil sorcerer, the Revenants would collapse and the Confederate numerical advantage would be neutered.
Unfortunately, he couldn't quite capitalise on this and the Necromancer managed to slink into the Hunting Grounds, from where he eventually managed to heal himself. In fact, this game saw uncharacteristically bad luck on the part of Tom beyond the initial turns!
On the right flank, the Apaches ran into the Twilight Order's vanguard- a chaotic shootout ensued, during which Taklishim summoned a Wendigo- the beast screeched it's feral hunger most impressively; seconds before a silver bullet drilled it between the antlers and it dropped, physical form already unravelling. Meanwhile, the now-wounded Bodaway and his warriors were pinned behind the shack by a Confederate sniper atop the water-tower- with no red cards in my Hand to shift into the other realm, they were stuck for the moment... My cunning 'two-pronged assault' was already in tatters!
Taking advantage of this distraction, the Firemakers rallied and grabbed two loot counters from under the noses of the enemy- Taklishim and his surviving men mopped up the Order's grunts that still opposed them and positioned themselves ready to join the big scrap as the game drew to a close!
It didn't all go to plan, however- Bodaway (now in Wolf-Form) made a break from cover to draw attention away from his warrior who had the loot, and was gunned down by the Confederate sniper.
The sharpshooter then shifted into the Hunting Grounds to take down the fleeing Apache in the final turn- only to realise too late that his vantage point existed in the physical realm. The structure beneath his feet faded into a spectral outline, and the man plummeted to his death- the lesson here is always pay attention to which Plane of Existence you are in, kids!
The game finally drew to it's bloody conclusion with the luckless Twilight Order wiped out to a man in the brutal melee and the Apaches making a fighting retreat against the relentless Confederates- both Posses reduced to a fraction of their former strength, and both holding two pieces of loot...
When the VP were counted up, the Confederates had squeaked a narrow victory thanks to the number of kills they had inflicted on the Order- a well deserved victory for Tony!
I would be playing my Apache Posse- the Firemakers (using the Theme rules from HG); Tony would command the Dark Confederacy, and Tom would assume the mantle of the Twilight Order.
We would be playing on less urban terrain, so I set up a badlands ranch as the 'Ghost Town' surrounded by rock formations and cacti- as per the Scenario, the buildings would begin the game in the spirit realm; and so we used green glass counters to show this.
The game began with the Posses converging on the spectral buildings- the Twilight Order hanging back slightly to assume good firing positions (one rifleman by the name of Hank even clambering to the top of a precarious rock-spire), while the Confederates advanced behind their usual wall of expendable Revenants! The Firemakers, meanwhile, divided their forces- one half led by their Chief, Bodaway; the other led by the Shaman Taklishim.
Bodaway's group would shift into the Hunting Grounds and attack from there, while Taklishim's braves would mount an assault in the physical realm. The cards were kind to me, and I got the necessary red suits to pull this two-pronged assault off!
*The Firemakers cautiously advance on the ranch...
Careful fire-discipline in the early stages of the game saw the Order give the Confederates something to think about- first mowing down the Revenants and then opening up on the living behind, they managed to Shake the Necromancer- Tom knew that if he could drop the evil sorcerer, the Revenants would collapse and the Confederate numerical advantage would be neutered.
Unfortunately, he couldn't quite capitalise on this and the Necromancer managed to slink into the Hunting Grounds, from where he eventually managed to heal himself. In fact, this game saw uncharacteristically bad luck on the part of Tom beyond the initial turns!
*Hank takes up position atop a rock-spire to give covering fire to his comrades in the Order.
On the right flank, the Apaches ran into the Twilight Order's vanguard- a chaotic shootout ensued, during which Taklishim summoned a Wendigo- the beast screeched it's feral hunger most impressively; seconds before a silver bullet drilled it between the antlers and it dropped, physical form already unravelling. Meanwhile, the now-wounded Bodaway and his warriors were pinned behind the shack by a Confederate sniper atop the water-tower- with no red cards in my Hand to shift into the other realm, they were stuck for the moment... My cunning 'two-pronged assault' was already in tatters!
*The Wendigo appears from the aether and assumes an intimidating pose...
*... And an unimpressed Crusader of the Order guns it down without breaking stride!
Across the table, a mass brawl broke out in the yard between the Confederates and Twilight Order as they vied for control of the ghostly buildings and the loot within- both sides fed more and more fighters into the melee, but it soon appeared that the relentless undead (helped by Tom's atrocious luck!) had the upper hand...
*Things get messy out in the yard!
Taking advantage of this distraction, the Firemakers rallied and grabbed two loot counters from under the noses of the enemy- Taklishim and his surviving men mopped up the Order's grunts that still opposed them and positioned themselves ready to join the big scrap as the game drew to a close!
It didn't all go to plan, however- Bodaway (now in Wolf-Form) made a break from cover to draw attention away from his warrior who had the loot, and was gunned down by the Confederate sniper.
The sharpshooter then shifted into the Hunting Grounds to take down the fleeing Apache in the final turn- only to realise too late that his vantage point existed in the physical realm. The structure beneath his feet faded into a spectral outline, and the man plummeted to his death- the lesson here is always pay attention to which Plane of Existence you are in, kids!
*The Dark Confederacy secure the farmstead as the Skinwalkers melt away into the wilderness with their loot!
The game finally drew to it's bloody conclusion with the luckless Twilight Order wiped out to a man in the brutal melee and the Apaches making a fighting retreat against the relentless Confederates- both Posses reduced to a fraction of their former strength, and both holding two pieces of loot...
When the VP were counted up, the Confederates had squeaked a narrow victory thanks to the number of kills they had inflicted on the Order- a well deserved victory for Tony!
Subscribe to:
Posts (Atom)
Arnor Lives! Plus of course some rambling...
With the weather (only slightly) curtailing my wanderings in the Great Outdoors, I have been back at my painting desk feverishly churning th...
-
Since I'm in such a good mood right now (see previous Post), I thought I'd jump ahead of schedule a bit and post up a link so you ca...
-
Here we are with the last in this little 'mini-series' of Posts giving you new rules to try out in your games of Dracula's Ameri...
-
Exciting times today- I got home after work to find this little beauty sat on my doormat... That's right; one of the first hard cop...