Showing posts with label Historical. Show all posts

Tuesday, 14 November 2017

Camels and Catastrophes- The Sudan.

Another historical game with the local gamers- this time a Sudan scenario using Warlord Game's Black Powder rules. We use Warlord's 'Big Three' (that is, Hail Caesar, Pike & Shotte and Black Powder) quite often in our historical gaming- they share very similar core mechanics so we can just get on and play without having to look too much up, even if it's been a while between games- the downside of course is that all three are just different enough that it can be easy to get mixed up as to the way certain rules work (or maybe that's just me) in a certain 'period'!

Anyway, this is the fifth or sixth game we have played set in the Sudan- it's not a war I know a great deal about (surprise, surprise!), but I do know that you can have camels...
Hence, I'm usually on the Sudanese side, and I always have as many guys riding camels as possible!

The Scenario was to be a simple breakthrough- the Brits (Tony) and their Egyptian allies (Tom) had to fight their way up the table and off to freedom, while the Sudanese (John, Andy and myself) could sweep in majestically from either flanking edge on their camels and lay waste to the enemy columns!

*The British brigade- including the accursed cavalry! All the models used in this game are 20mm plastics owned and painted by John.

*My own brigade- including my glorious camels in the centre!

It all started so promising, as the over-confident Egyptians forged perilously far ahead of the sluggish Brits (Tom forgot to designate a stopping point when issuing orders, so his whole brigade moved their full speed straight up the valley- that's 36" for Infantry, and 54" for Cavalry!!).

*The Egyptians get ahead of themselves...

Andy's brigade went straight up the centre to meet them, while my own Fanatical troops swept on from the right flank- my skirmishers taking up position in a ruined building to hopefully get some enfilading fire, while my camels readied themselves for a charge in the next Turn- I was wary of getting stuck in too early and being counter-charged by the British Lancers straight away, but in hindsight I probably should have just got stuck in while the Egyptians were in column and cut a hole through their formation. My fixation on preserving my undoubtedly valuable camels would prove my undoing...

*My cavalry get in position to catch the Egyptian column in the flank!

Meanwhile John (the Mahdi himself!) forgot to state his orders before rolling his command test- this resulted in an automatic Blunder! Instead of sweeping on from the left flank to close the trap on the Egyptians, his whole brigade retreated. Since they were already off-table, we decided that this would delay them for a whole Turn while he got them back into position.

The Brits continued to advance cautiously (Tony only managed one Order on his command test), but would be ready to counter-charge my cavalry in the next Turn if I didn't act quickly- the Egyptians managed to shake their troops out into line and face my flanking force, while their skirmishers decided they had bitten off more than they could chew and fled before my screaming Tribesmen- ceding control of the oasis to my forces!

*Mid-day at the oasis... My skirmishers take position in the ruined building to the right.

The Sudanese were still feeling good at the start of our second Turn- Andy managed to bring up the rest of his troops to reinforce the oasis and get in position to engage the Egyptians, while I got the bulk of my infantry up to join them- so far, so good... And then I failed the command test to get my cavalry moving- they just stood there, milling in confusion (I reasoned that the camels were stubbornly refusing to shift) as the British bore down upon them!

In the next Turn, the Brit cavalry leapt into life and crashed into my poor, dithering camelry- Lancers to the front of me, and Hussars to the left! Predictably, my much-vaunted camels evaporated like rain in the desert...

*Yep; this is going to hurt a little...

Meanwhile, the plucky Egyptians- now supported by their British allies- had a good round of fire that saw my poor infantry disordered. If I attacked in my next Turn it would be piecemeal, and easily repulsed...

Sudanese Turn 3 rolled around, and my surviving cavalry (only of the horse-kind, unfortunately) launched a desperate charge on the Egyptian lines on their own Initiative and overran a cannon. Making a sweeping advance into the flank of some Infantry, I rolled badly and couldn't capitalise- in fact, the Egyptians stood firm and drove me back with heavy casualties!
Meanwhile Andy made a spirited attack up the centre against some redcoats, while his own camelry struck the left flank of the Egyptian formation; but some devastating closing fire and bad dice rolls saw them repulsed.

*Andy gets stuck-in!

Finally, after missing a Turn, the Mahdi had his disorganised troops poised and ready to sweep on from the left flank and close our trap before it could falter- and John promptly failed his command test! There were jeers from the Brits and Egyptians- and also a few from his underlings- as our fearless commander's brigade stood around just off-table, seemingly content just to watch his loyal warriors get cut down in the valley below!

I was first to go- my brigade was broken by a hammer-blow of Lancers and Hussars over the next couple of Turns, and so my leader (riding my last remaining camel) and a handful of ragged survivors were left to flee across the dunes to safety, shaking their fists and spears in defiance and cursing the Mahdi's name!

*Next time, you British dogs; next time!!

All credit to Andy- he managed to hold out just long enough for John's brigade to finally enter the battle, but it was too late! A small British Naval force had brought up a gatling gun, and set it up on the right flank (once occupied by my own troops) where it rained fire down on his beleaguered forces. Riddled with fire and already weakened by the fierce fighting, Andy's brigade finally broke when the Hussars returned from harrying my fleeing forces and crashed into them.
The Mahdi redeemed himself somewhat with a vicious attack on the right flank, but with two of the three Sudanese brigades broken he was forced to withdraw...

*The battered Sudanese- now reinforced by the Mahdi's troops- put up a brave fight... But the end is nigh as the Union Jack flutters proudly on the desert breeze...

A victory to the British and Egyptian forces, and a highly entertaining and cinematic battle as always!

Saturday, 28 October 2017

Back to the Gaming Table, Part 2. (Or, Charlie Owns the Night!)

In my previous Post, I mentioned that we played a big game of Force on Force Vietnam this past Sunday.

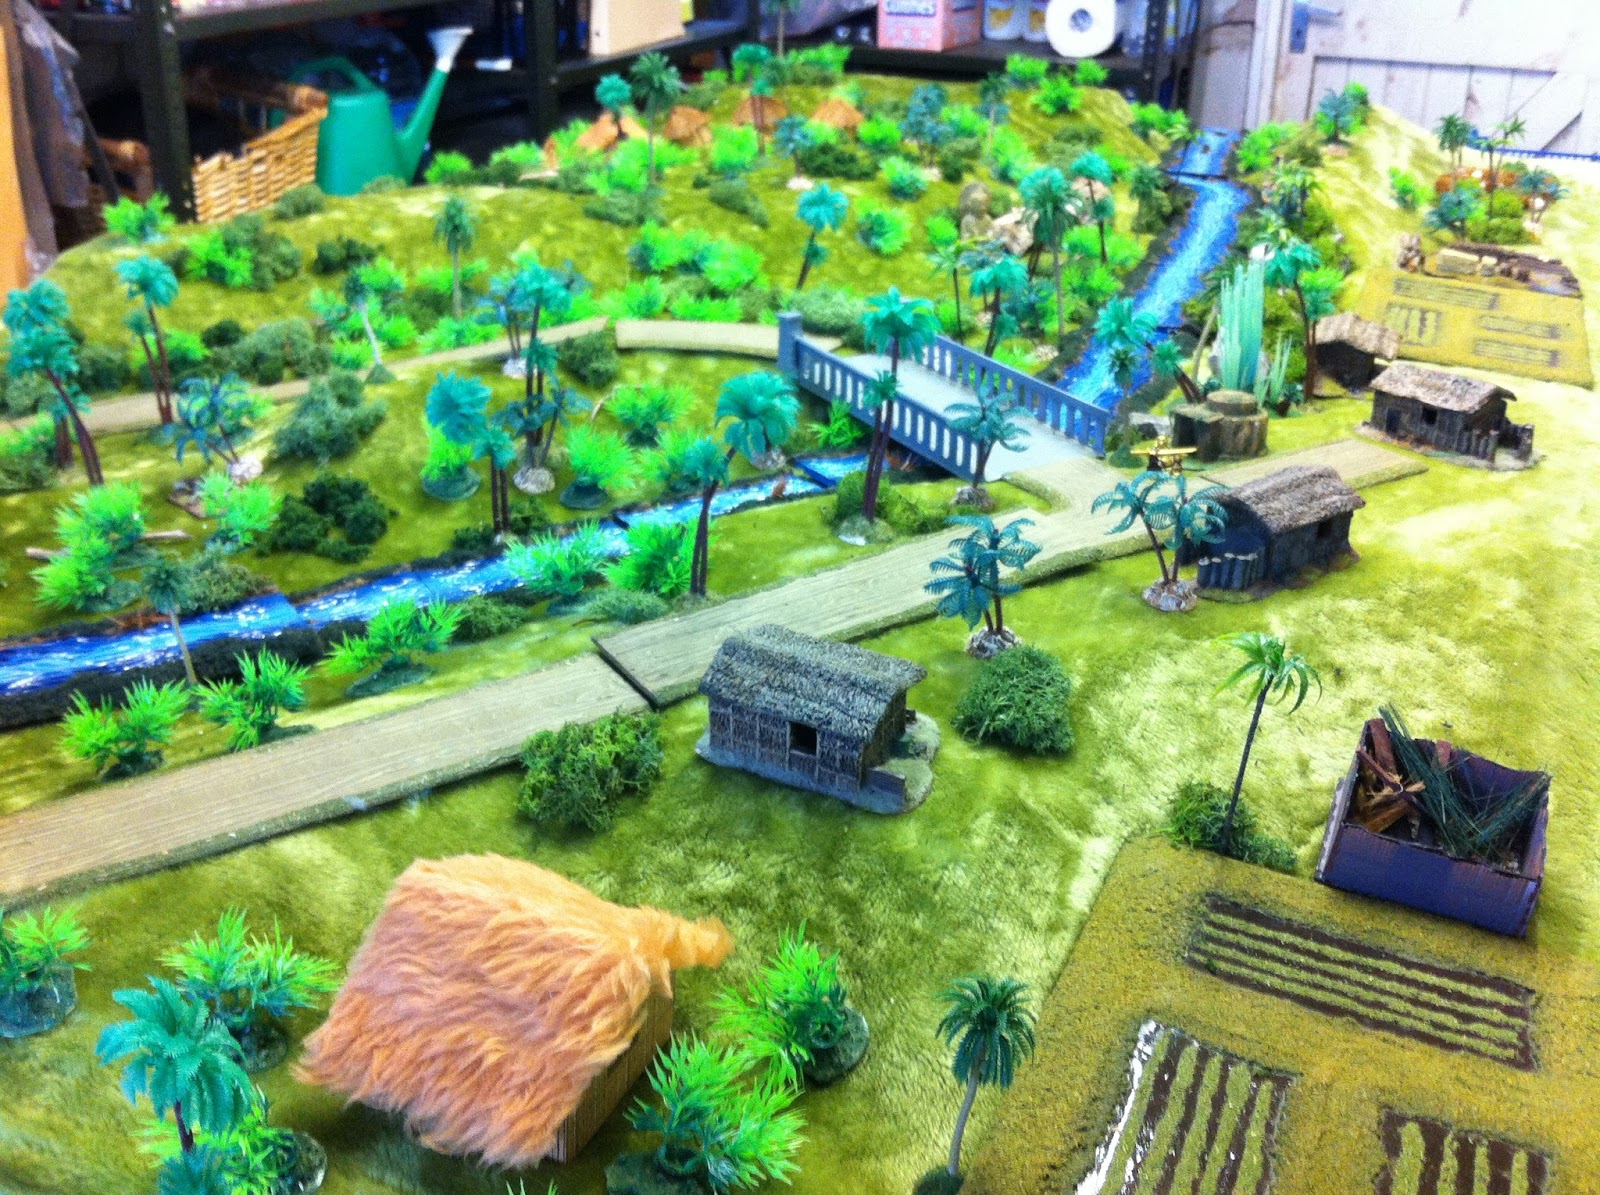
Compared to our humble Frostgrave game, this was a proper gaming extravaganza, recycling the jungle terrain from our WWII game of a few weeks ago but adding a separate section of tunnels for the Americans to fight through (if they found the entrance).
The Scenario was cooked up by Andy, Tony and Tom, and featured those three plus John as the Americans versus my endless hordes of Viet-Cong and a small detachment of NVA.
The twist was that the US players had a pool of cards detailing various missions that they had to complete. These were drawn randomly by each player, and upon completing a mission they immediately drew another- thus taking their beleaguered forces from one hot-spot to another, often with no time to resupply or draw on fresh recruits! Force on Force (by Ambush Alley Games) is a neat system that focuses on many of the grim realities of warfare, such as how to deal with the wounded, civillians, or enemy prisoners. Usually, this kind of nitty-gritty would put me off a game, but it is handled in a simple way that kept the pace of the game flowing and indeed kept it firmly in the realm of 'Game' rather than 'Simulation'.

*Looking up the table from the Southern Village, just before we got started.

My own mission was simply to cause trouble for the other players- if my VC 'got perished', I could simply 'recycle' them back on wherever I wished- this also allowed me to stage ambushes, feint attacks and all kinds of havoc! Assisting me in this was a deck of Booby-Trap cards photocopied from the Vietnam sourcebook- letting me throw anything from punji-pits to concealed MG bunkers at the other players.

*Detail of the Shrine, with a possible tunnel entrance in the rocks next-door and a village nestling in the clearing beyond...

As I've stated before, this kind of thing is out of my usual gaming comfort-zone- but nonetheless I had tremendous fun! This was no simple 'achieve the objectives to win' game- this was every Hollywood cliché rolled into one, and I soon realised that I could use my forces to be the 'Director' of a tabletop movie of which Arnie would be proud (though they stopped short of letting me introduce a Predator to the proceedings, the Philistines)!

*The Action kicks off with John's armoured column making it's way down-river in their amphibious vehicles- straight into a VC ambush! From the cliffs, RPG fire erupts and takes out several machines. The survivors pile out of the burning wrecks, and the ensuing firefight would last pretty much all game...
*...Meanwhile, the Northern village burns as the Americans perform a sweep of the area- capturing one of the VC sympathisers trying to escape, they interrogate him for the whereabouts of the tunnel entrance!

Villages were searched for weapon caches and promptly burned, and small teams of Rangers made desperate last stands at the LZ against hordes of VC charging from the surrounding jungle while flights of Hueys swooped in to save the day amongst incoming RPG fire (you could almost hear the strains of The Doors and Creedence blaring from their speakers!). Downed helicopter crew dragged their wounded along perilous jungle trails, fending off wave after wave of attackers and a relentless procession of booby-traps, while grizzled veterans took the fight into the cramped network of tunnels...
*With the tunnels discovered, the Americans begin clearing them of the enemy- this is actually one of a series of WWII trench-systems we used to represent the fighting taking place beneath the table. Eventually, I would play a card that saw a raging fire break out as stray rounds set off an ammo cache- the fight would soon become a running battle back through the corridors in an attempt to escape!

*Back on the surface, the battered but unbowed elite US forces finally clear the Southern Village after some brutal fighting- only to discover a column of NVA are now only minutes away! Linking up with the crew of a crashed helicopter who slogged their way through the jungle to be there, they call in the Hueys to extract them- braving anti-air fire from the forward NVA elements, the survivors finally make it off-table.

Who won? You know, I don't think anybody really knew by the end- and I don't think anybody really cared all that much!
*A concealed VC Machine Gun Bunker appears as if by magic, and opens up on the hapless American patrol!

All I know is- that this is why I play tabletop games...

Monday, 9 October 2017

8/10/17: WWII- The Burma/India Border.

Oh yes, we play historical games as well!

This was a WWII battle using the Rapid Fire rules- not my favourite historical period to game in (I much prefer my Old West,  Dark Ages and ACW!), and I know very little about it, but the other guys love it and have a huge collection of various fully-painted armies in 20mm, so I cheerfully turn up to roll some dice and frustrate Andy with my complete ignorance of the period!

Me: "OK, I'm firing my MG at your guys."
Andy: "Mate, that's a PIAT..."

I really am trying to get better, but for some reason my eyes just glaze over when it comes to the minutiae of WWII on the table-top...

Anyway, due to Real Life I turned up after the guys had already started on Sunday, and was promptly given some Japanese tanks and (to my great delight) some fellows riding bicycles(!), and ordered to take a railway bridge over the river. Opposing me was a column of tanks- I think they were Stuarts.
*The intrepid men of the 1st Kyoto Bicycle Cavalry Division.

Whatever they were, they shrugged off the pitiful fire of my tanks and in return blew their targets up with surgical precision. Meanwhile my hapless cyclists wobbled and clattered up the train tracks towards almost certain doom, tiny 20mm faces set in grim concentration.
*The bridge too far!

Unfortunately they were slowed by the terrain, and just couldn't make it to their objective in time- the Indian engineers blowing it up right in their faces!
*Mission: Failed! A nice touch is the coal spilling from the upturned carriage.

Thankfully, the main Japanese army had already taken the other bridge down-river before I turned up, and were now sweeping up the flank annihilating any Indian resistance they encountered. My rivals across the railway bridge saw which way the wind was blowing and beat a hasty retreat, and the field belonged to the Japanese!
*The other Japanese players make up for my failure!

I then discovered the game was a technical win for the Indian army, as they had managed to rescue the local Commandant from his palatial home earlier in the day- combined with blowing up the railway bridge, this gave them two victory conditions to our one. Their gallant defence had paid off!

Though I only took part in the final few turns of the game, the lads had really outdone themselves with the terrain so I thought I'd leave you all with some of the highlights!
*The Japanese side of the river- complete with the Commandant's personal rowing boat!

*The Japanese take control of the Commandant's private Tennis court.
*Looking over towards the village and logging-camp on the far side of the river. In the distance, a crashed Japanese aeroplane sticks out of the roof of a barn!
 

Arnor Lives! Plus of course some rambling...

With the weather (only slightly) curtailing my wanderings in the Great Outdoors, I have been back at my painting desk feverishly churning th...